Overview
Reviews & Awards
Buy
![]()
Fan Sites
Message Boards
Developer's Lounge
STRATEGY AND TACTICS
Homeworld represents a new type of real-time strategy game. For fans of strategy and space combat, many of the elements that make these genres exciting still exist within Homeworld. But adjusting to a three-dimensional environment requires learning a whole new set of skills. In Homeworld, the enemy attacks from all sides — there is no safe corner of the screen to hide your fleet. Your battlefield is infinite, yet there remain key points within each map to defend. Formations and tactical attack settings actually influence each combat situation, and varied ship capabilities require you to think before sending elements of your armada up against the might of an enemy's fleet. This section outlines the key elements of strategic game play within Homeworld. Master these skills before sending your armada on a journey to the farthest reaches of the Galactic Core!
Formations
Rules of Engagement
There are many different types of vessels within Homeworld, and it is critical to understand their strengths — and weaknesses — before sending them into battle. Homeworld can not be won by favoring a single class of ship. Successful armadas will include a diverse array of vessels that excel at specific tasks.
When encountering an enemy fleet, a crucial decision involves choosing which ships to deploy to attack your opponent or defend your armada. Fighter class vessels such as Interceptors are generally the quickest ships available in your armada, and require fewer resources to build and maintain. For long-range scouting missions or for hit-and-run attacks on vulnerable enemy formations, these ships are invaluable. For added firepower, Fighter formations can be bulked up with a variety of slower but more dangerous Corvette class ships.
However, larger classes of ships such as Destroyers can not be stopped by Strike Craft alone. Effective strategies involve deploying a mix of Capital Ship vessels along with an accompanying fleet of smaller Strike Craft. Larger ships such as an Ion Cannon Frigate can effectively engage a Destroyer with its heavy artillery, while a squad of Light Corvettes flying an evasive formation can quickly wear down the larger ship.
At the same time, Strike Craft are frequently needed to defend Capital Ships from large formations of smaller Fighter and Corvette class vehicles. A group of Capital Ships can quickly find itself vulnerable targets to masses of nimble Interceptors.
Tactics
Environment
In regions of space with scarce resources, protecting the few pockets of available resources becomes just as important as guarding your Mothership against assault. Depriving an enemy of resources or continuously harassing enemy resource collectors forces your opponent to take a defensive stance when it comes to fleet deployment.
As your journey progresses towards the resource-intensive central galaxy, tactics must shift to compensate for the changing environment. Navigating through massive nebulae decreases visibility and allows for smaller Strike Craft to surprise the enemy. Also, large asteroid belts can hide small groups of ships when trying to flank an opponent.
Fleet Management
With a huge array of vessel types available in a completely unbound playing field, effectively managing your armada can be a daunting task. While it is possible to closely monitor the smallest battles early in the game - and issue orders to individual ships — later missions require a balance between tracking the progress of smaller ships and planning the overall strategy for the armada. This becomes especially important when engaging in battle on multiple fronts with dozens of ships involved in each skirmish.
Effective fleet management involves choosing appropriate formations and attack tactics for vessel groups, while also ensuring that your ships are going up against the right kind of target. Experiment with matching different ship classes against an opponent to determine which ships are most effective against certain targets. For example, a small squad of Multi-Gun Corvettes may make quick work of a Scout formation, but might be no match against a Heavy Cruiser. Also, deploy a mix of ship types when planning your assault, since giant Capital Ships can be brought down by swarms of smaller vessels if left unprotected.
When entering a battle, assign clusters of smaller ships tasks such as engaging other Strike Craft formations. Monitor the progress of these battles, but also take command of your Capital and Super Capital Ships to concentrate their fire on one target at a time. When fighting on multiple fronts, utilize the Sensors Manager to jump quickly back and forth between engagements. Effective commanders will keep tabs on the progress of a battle long enough to adjust attack strategies if necessary, while also monitoring the rest of the fleet to guard against other attacks.
Gameplay Tips
Single-Player:
Before Hyperspacing to the next mission, it's usually a good idea to check "Remain Docked" in the Launch Manager. That way your strike craft won't come popping out until you want them to. There are a few occasions where you'll lose your strike craft if they come out too soon.
Salvage, salvage, salvage. If you salvage (steal) every ship you can, you'll end up with a fleet twice as large as if you don't. You'll also have ships that you can't build yourself. One place this is particularly important is in Mission 3.
Take everything Fleet Command says with a grain of salt. If they tell you to do something, like send a probe, or investigate an area, you'd better think twice. Often, if you follow Fleet Command's directions, you'll end up in all kinds of trouble.
Harvesting — Build at least one Resource Controller for every two Resource Collectors. When you send the Collectors out to harvest, tell the Controller to guard the Collectors. (If it's guarding two, it will stay equidistant between them.) You will be able to harvest much more quickly, which can be the difference between life and death in some missions.
Multiplayer:
Keep Cloak Generators around your Mothership. They won't cloak the Mothership, but they will hide your fleet. Your enemies may overstep themselves and attack you with insufficient forces, thinking you're an easy kill. Imagine their dismay when Heavy Cruisers and Destroyers start popping up all over.
In games with Hyperspacing on, start building a Gravwell Generator, but pause it when there's about 1 RU left before it's completed. If someone Hyperspaces in, you can pop that Gravwell out in about three seconds, usually in time to catch your enemy as they're hyperspacing in. (Any smart enemy will send a probe before hyperspacing, to ensure there are no Gravwell Generators. This way they don't think you have one until it's too late.) This same idea can be applied to any ship that's too large to dock that you want to stay in your Mothership.
If you are building Frigates from a Carrier, they won't pop out until the Carrier is stopped. You can use this to your advantage and have a whole fleet of Frigates waiting inside your Carrier. When someone comes to attack you, you just stop the Carrier, and the Frigates all pop out. It's all about surprise.
Ally with anyone who will ally with you. (Also known as the Switzerland Maneuver.) The fewer enemies you have, the easier it is to build your empire. You can always break your alliances later. (Backstabbing is fun, and a good way to make new friends.)
Scuttle bomb — Use your Scouts as a smart bomb. Most effective against other Scouts. Tell them to attack a target, then scuttle them just as they reach the target. If you get the timing right, you can take out two scouts for every one of yours that blows up.
Defenders. A large group of these (40-50) in a wall formation can plow through anything but multi-gun corvettes and missile destroyers. If you research these first and build a group of them, you have a quick and effective fighting force very early in the game.
Strike hard and strike early. One of the better strategies in a default game is to build an attack force immediately and select an opponent to neutralize. If you can take out someone's research ship and their harvesters early in the game, they will be hard-pressed to pose a threat while you continue to research better technology and build a more powerful fleet.
An excellent defense against enemy strikecraft is the Missile Destroyer and Gravwell Generator combination. Have a Gravwell Generator guarding a Missile Destroyer or two and when a group of enemy strikecraft approach, activate it. The strikecraft then become easy and harmless targets for your Destroyer(s) to pick off.
When searching for an enemy Carrier, watch your probe as it moves. At the first glimpse of the Carrier, scuttle the probe. Odds are, your enemy will not be watching their Carrier; they will be at their Mothership or their fleet. When their Mothership is gone, you'll know where to send your fleet and they'll think they're safe — for awhile.
Strike Craft have two major advantages over Capital Ships: Speed and Maneuverability. Keep your formations manageable in order to use these advantages. If your formation is too large (over 20, except for defenders — too slow) it will take more time to maneuver and you may lose your advantage.
Your mothership can move in multiplayer. Move towards resource pockets to increase harvesting efficiency.
Probes are very useful for gathering intelligence on what type of fleet the enemy is building and for picking up crates (tiny red pinpoints in the sensor manager).
 1. Delta:
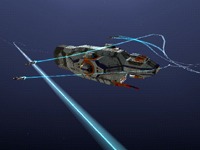
The standard flat triangle formation is an excellent way of organizing groups of Strike Craft into effective squadrons, but it lacks the flexibility and firepower concentration available to the more three-dimensional formations.
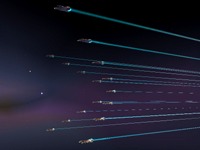
 2. Broad:
This flattened line is not effective for Strike Craft, as it disperses their firepower. It is more useful for a squadron of Capital Ships, where quick unit identification and selection are as important as firepower. This is a useful formation to approach in if you are planning to break ships off to strike at specific targets once the battle is joined.
 3. X:
3. X:
The flying X formation is an excellent Strike Craft formation, as it concentrates a large number of vessels into a relatively small three-dimensional space. Its only drawback is that the dense formation makes individual ships vulnerable to slow turret fire they might otherwise avoid if they were dispersed.
 4. Claw:
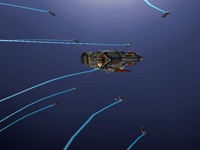
Like its natural namesake, this formation is deadly when striking out at an individual target. The claw is a superb formation for Strike Craft when they are targeting a Capital Ship. The four curving lines of Fighters make concentrating firepower and envelopment deadly efficient, with the only drawback being identifying and selecting single ships inside this complex formation.
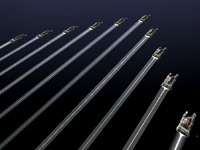
 5. Wall:
Most effective for Capital Ships, this formation allows larger vessels to concentrate firepower without dangerously crowding each other. The wall is not a subtle formation but does give large groups of big ships an effective attack mode.
 6. Sphere:
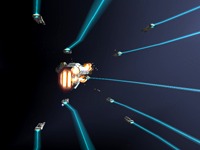
This is the deadliest of all formations in terms of continuous firepower. Ships in this formation lose their ability to perform complex flight maneuvers, but gain the ability to fire at targets constantly from every angle. This is also an effective guarding formation, as it puts the vessel to be protected in the center of the sphere.
 7. Military Parade Formation:
When ships are first built, they come out of the Mothership or Carrier and go into Military Parade formation with that ship. These ships can be put back into parade formation at any time, although there is a limited tactical benefit for arraying the fleet in this fashion.
 8. Custom:
If none of the formations suit your needs at a given movement, ships can be placed in a custom formation at any point in the game. Custom formations can be effectively used for precision missions where a combination of Capital Ships and Strike Craft need to be deployed.
 Evasive:
Evasive tactics are best used when resources are tight and each ship is vital. Your ships won't hit as hard but they are more likely to come home. Ships set to Evasive will boost power to engines in order to increase speed and maneuverability. This will come at the cost of lowered power to weapons and a slight increase in fuel consumption for Strike Craft. When attacking, groups will also break up into flight pairs where one ship will take point and the other will serve as wingman and take measures to remove threats that lock onto the lead vessel.
 Neutral:
This is the normal stance for ships. Strike Craft flying under Neutral setting will balance firepower requirements with speed when attacking enemy vessels.
 Aggressive:
Ships in Aggressive mode are out for blood and will attempt to destroy the enemy even at the cost of their own lives. Use this tactical stance if resources are not a factor or you need to hurt your opponent as hard and as quickly as possible. In this mode power is shunted from the engines into the weapons grid so speed and agility are reduced but firepower is increased in damage, weapon range and firing speed. Ships will not perform any kind of evasive maneuvers but instead will stay in formation no matter what and concentrate on pouring fire into their target.
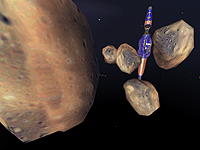 Maneuvering within true three-dimenional space eliminates the bottlenecks that plague many strategy games, but effectively utilizing your environment is just as critical within Homeworld. The journey begins at the edge of a standard spiral galaxy and moves steadily towards the research-rich galactic core. Dust clouds and asteroid belts not only provide critical resources for powering your armada but also become strategic hubs when dealing with an enemy fleet.
Resource Management
Strategy and Tactics
Combat
Units
Research and Technology
Homeworld / Player Guide