Single-Player Import Store Walkthrough
A Brief Look at the Menus
Selecting the element, Red Team or Blue Team from the main menu displays a menu with a set of communication options that change depending on the context of your mission and whether you are in Dynamic or Stealth mode. Learning what orders to give your team in a given situation is critical to your success in SWAT. This walkthrough covers the basic orders you need to succeed. If you select "Report" from the main menu, you'll get the following options:
The Import Store
The mission begins outside the River Tigris Import store. There is only one entrance into the store, through the front, and the glass door and display windows make entry dangerous. Any armed suspects in the store can watch your approach and shoot at you!
As long as your secrecy is not compromised while you're outside the store, your team will follow your orders precisely. If a suspect sees you, your team will automatically go into Dynamic mode and engage. If you chose to begin the mission in Dynamic mode, you will have two command options for entering the store: "Breach, bang and clear" or "Breach and clear." The first option includes the use of a flashbang upon entering. This can be an effective method of disorienting possible suspects, but is also a bit slower to execute, plus you may want to save your flashbangs for later. If speed is of the essence because you've been spotted, you might want to command your element to "breach and clear" and throw a flashbang into the store yourself. Once again, you command your element with a combination of your reticule and the number keys. To have your element "Breach, bang and clear," you will need to point your reticule at the door, press the 1 key to address the element, followed by the 1 key to execute the command. To command your element to "Breach and clear," you will need to point your reticule at the door and press the 1 key, followed by the 2 key.
Now, while continuing to hold down the left mouse button, point your flashbang reticule at the door and command your element by pressing the 1 key, followed by the 2 key. Once your team opens the front door, release the left mouse button. The flashbang is tossed into the store. (Make sure you're pointing at the door!) This maneuver can be tricky to master, but it's very effective once perfected. Note that you use the same maneuver when deploying CS gas, which you select by pressing the F4 key.
The rules of engagement for a police officer are clear: If you are under fire, engage immediately. If an armed suspect points a weapon at you, engage immediately. If an armed suspect is not threatening you (their gun is not pointed at you or they are running away), or you encounter an unarmed person, issue Compliance by pressing the 7 key. You may have to issue several compliance orders to get an individual to cooperate.
Compliance, or the issuance of verbal commands, does not always work. This is when the
use of non-lethal tactics, such as the deployment of CS gas Compliant individuals kneel on the ground with their hands above their head. Once an individual is compliant, they need to be secured and evacuated from the building. To do this, either handcuff the individual (by pressing the F8 key), or command your element to do so (pressing the 8 key from the command menu). Once the individual is handcuffed, point your reticule at them and use the command structure to report to the Command Post that the individual is safe for evacuation (press the 4 key for Report, and then press 2 for Evac). If an individual is wounded, there is no need for handcuffs, but to preserve life, the wounded need to be evacuated. If an individual is killed, they do not need to be evacuated. Once the front of the store is cleared of all threats, and any and all suspects are secured and evacuated, continue moving through the store. Along the back wall there is a door leading to a storage room. If this door is closed, you will want to open it and clear the room beyond. As with the front door, you can choose many ways in which to open this door: you can order your element, Red team or Blue team to open in a Dynamic or Stealth manner. Or you can open the door and order your element to follow or cover you. Remember, the situation dictates the tactics &$151; there is no single approach to room entry. Once in the storage room, clear it of all threats. At the far end of the storage room there is a door. Beyond this door is a small room, which leads to a hidden room, which in turn leads to a basement. The two rooms leading to the basement are small and can contain armed suspects, and possibly a hostage. You can give yourself an advantage by deploying CS gas into the first room prior to entering. You can also command your element to deploy CS, or you can command Red to deploy it while Blue covers… The possibilities are endless. Just note that these rooms are small and divided and make for dangerous maneuvering. Before you open the door to the stairwell, choose your tactical mode. Whether you should enter the basement stairwell under Dynamic or Stealth mode depends on the amount of noise you've made thus far in the mission — gunfire and flashbangs make a lot of noise and will alert suspects to your presence. You'll find that the basement is extremely dark in many places. You can turn on your weapon's flashlight by pressing the F key. You can approach the basement in many ways: deploy massive amounts of CS gas to disable the suspects (though this may harm the hostage), call the suspects out by issuing compliance or use your Opti-Wand to look around every corner for suspects or the hostage. A number of different tactics may allow you to rescue the hostage and get your team out alive. The basement has two hallways, a couple of open areas and a small room with a door. The hostage and suspects may be in any number of locations; the AI does not constrain them to a particular area. So keep your eyes open, and shoot only those threatening you. If you're too quick on the trigger, you might shoot one of your own coming around a corner, or you might shoot the hostage.
When you find the hostage, make sure you secure and evacuate him. Yes, even hostages are secured with handcuffs — that is, of course, if they aren't wounded. If the Ambassador is wounded, he need only be evac'ed out of the building (option 4-Report, then 2-Evacuate). If the Ambassador dies during your mission, the mission will be considered a failure. However, failing the mission does not end the mission. You can continue to salvage what you can. Good luck.
|
|||||||||||||||

 In the Import Store single-player mission, an unknown number of terrorists led by
Lokman Damar have holed up with their hostage, Ambassador Jemil Kemal. Your mission
objectives are to rescue the ambassador, gain control of the suspect Lokman Damar and
bring order to chaos. To check your progress throughout the game, press the B key. An
in-game
In the Import Store single-player mission, an unknown number of terrorists led by
Lokman Damar have holed up with their hostage, Ambassador Jemil Kemal. Your mission
objectives are to rescue the ambassador, gain control of the suspect Lokman Damar and
bring order to chaos. To check your progress throughout the game, press the B key. An
in-game 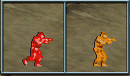 You can command your team to enter and clear the storefront, or you can take the lead and
have them follow — you choose the tactics. If one tactic doesn't work, try another.
You can also choose the mode under which you enter the store, Dynamic or Stealth. Remember,
Dynamic commands and tactical aids are intended to intimidate your adversaries, whereas
Stealth commands and tactical aids are intended to mask your presence. Press the Page Up
key to use Dynamic mode, or Page Down key to use Stealth mode.
You can command your team to enter and clear the storefront, or you can take the lead and
have them follow — you choose the tactics. If one tactic doesn't work, try another.
You can also choose the mode under which you enter the store, Dynamic or Stealth. Remember,
Dynamic commands and tactical aids are intended to intimidate your adversaries, whereas
Stealth commands and tactical aids are intended to mask your presence. Press the Page Up
key to use Dynamic mode, or Page Down key to use Stealth mode.
 You issue commands using a combination of the number keys and your reticule. To command
your element (all your men, both Red and Blue teams) to enter the store in Stealth mode,
point your reticule at the door and press the 1 key to select the element, followed by
the 1 key to have the element stack up. Once they're in position, continue to point your
reticule at the door and press the 1 key to select your element again. You'll notice
that the top choice of the following menu is now "Try door." Once the door
is open, command your team to enter and clear the store.
You issue commands using a combination of the number keys and your reticule. To command
your element (all your men, both Red and Blue teams) to enter the store in Stealth mode,
point your reticule at the door and press the 1 key to select the element, followed by
the 1 key to have the element stack up. Once they're in position, continue to point your
reticule at the door and press the 1 key to select your element again. You'll notice
that the top choice of the following menu is now "Try door." Once the door
is open, command your team to enter and clear the store.
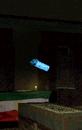
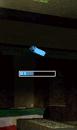 If you want to deploy a flashbang when your element enters, first press the F3 key. Your gun
reticule changes to a flashbang reticule. Next, point the flashbang reticule at the door. Now
click and hold the left mouse button. You will see a power-up bar. The more the bar fills,
the farther the subsequent throw.
If you want to deploy a flashbang when your element enters, first press the F3 key. Your gun
reticule changes to a flashbang reticule. Next, point the flashbang reticule at the door. Now
click and hold the left mouse button. You will see a power-up bar. The more the bar fills,
the farther the subsequent throw.
 Once in the store, clear it of all threats. Threats can be suspects or any unknown person
encountered in the store. A lone firearm can also be a threat. If you see a gun, secure
it by getting close to it, pointing your reticule at it, and then pressing the U key. If
you don't secure the firearm, it can be picked up by a non-friendly and used against you!
Once in the store, clear it of all threats. Threats can be suspects or any unknown person
encountered in the store. A lone firearm can also be a threat. If you see a gun, secure
it by getting close to it, pointing your reticule at it, and then pressing the U key. If
you don't secure the firearm, it can be picked up by a non-friendly and used against you!